Photoshop将水景人物图片打造高对比的暗调黄褐色效果
(编辑:jimmy 日期: 2026/2/6 浏览:3 次 )
素材图片也比较暗,处理的时候我们把暗部再压暗,并增加高光区域明暗对比;然后把主色转为橙黄色,这样初步的效果就出来了;后期单独调整好人物颜色,局部渲染一些高光即可。
原图
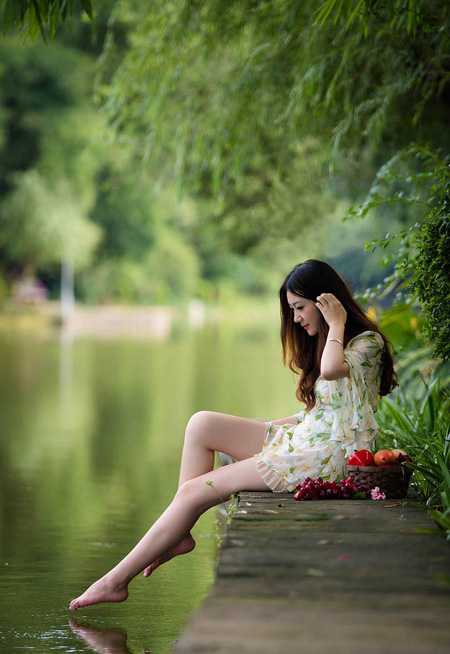
最终效果

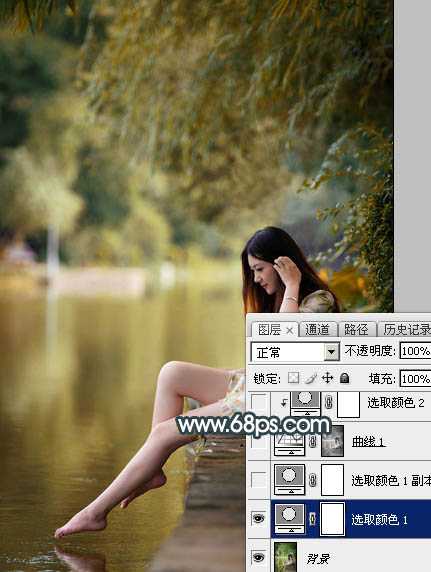
1、打开原图素材大图,创建可选颜色调整图层,对黄、绿、青、白进行调整,参数设置如图1 - 4,效果如图5。这一步把图片中的黄绿色转为黄褐色。
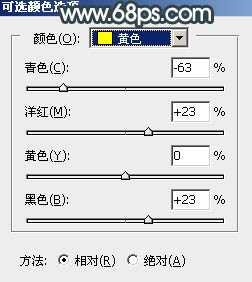
<图1>

<图2>
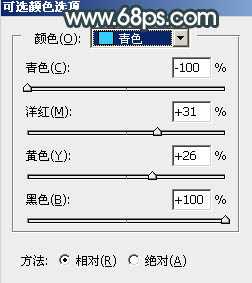
<图3>
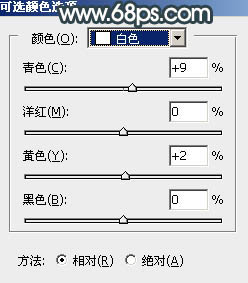
<图4>
<图5>
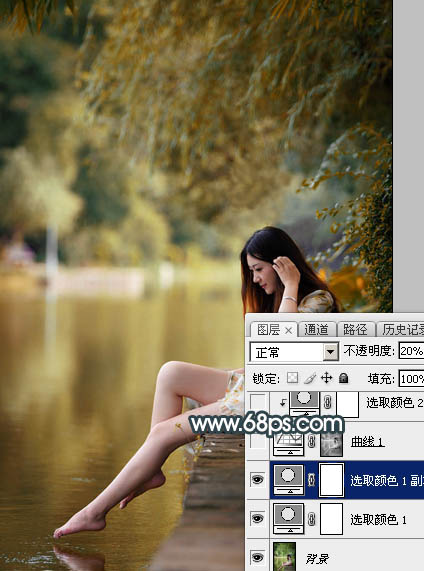
2、按Ctrl + J 把当前可选颜色调整图层复制一层,不透明度改为:20%,效果如下图。
<图6>
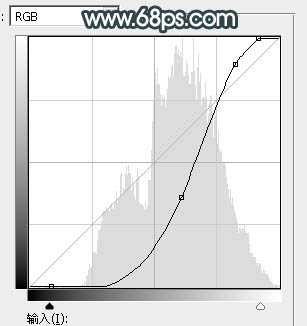
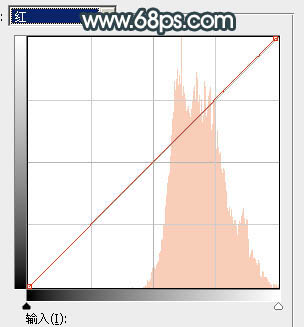
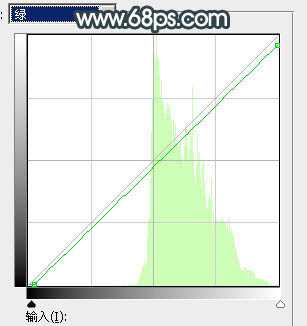
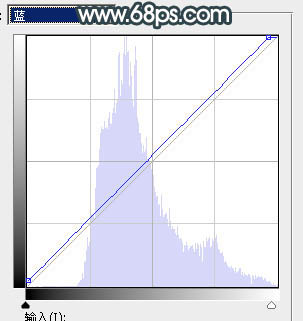
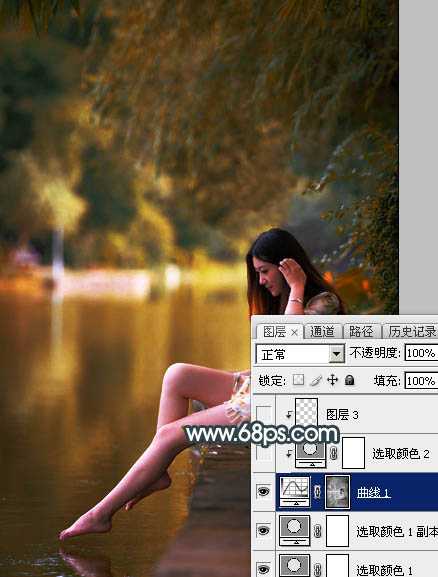
3、按Ctrl + Alt + 2 调出高光选区,然后创建曲线调整图层,对RGB、红、绿、蓝通道进行调整,参数设置如图7 - 10,效果如图11。这一步把高光区域大幅压暗,并增加明暗对比。
<图7>
<图8>
<图9>
<图10>
<图11>
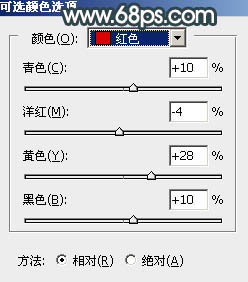
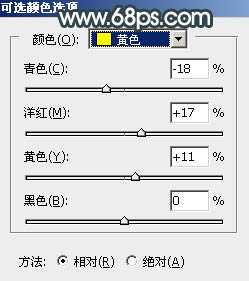
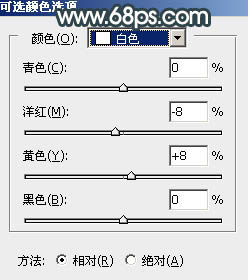
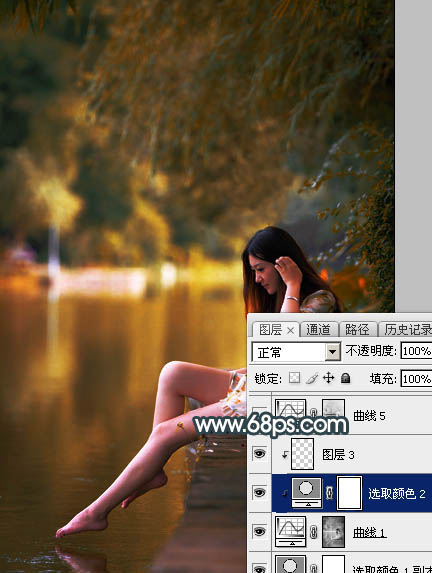
4、创建可选颜色调整图层,对红、黄、白、中性色进行调整,参数设置如图12 - 15,确定后按Ctrl + Alt + G 创建剪切蒙版,效果如图16。这一步给图片高光区域增加橙红色。
<图12>
<图13>
<图14>

<图15>
<图16>
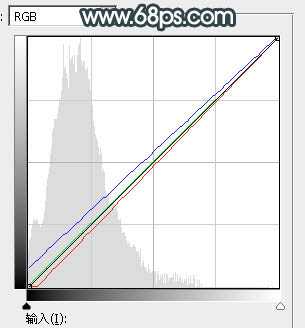
5、按Ctrl + Alt + 2 调出高光选区,按Ctrl + Shift + I 反选得到暗部选区,然后创建曲线调整图层,对红,蓝通道进行调整,参数及效果如下图。这一步适当简单暗部红色,并增加蓝色。
<图17>
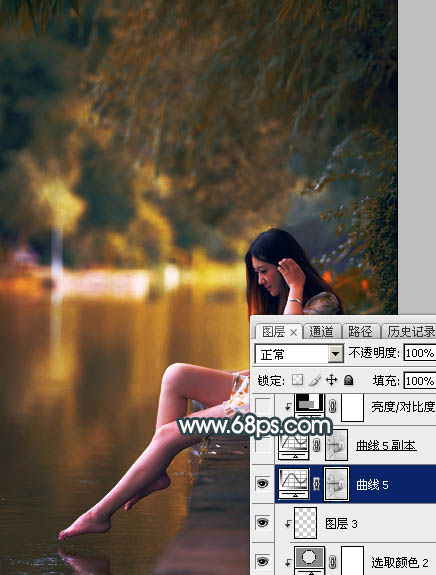
<图18>
6、按Ctrl + J 把当前曲线调整图层复制一层,效果如下图。
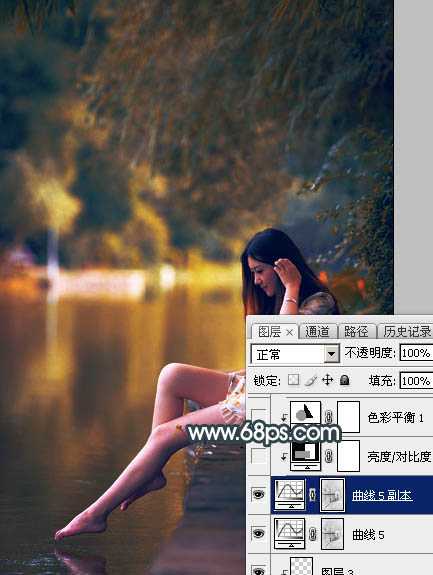
<图19>
7、创建亮度/对比度调整图层,参数设置如图20,确定后创建剪切蒙版,效果如图21。这一步增加暗部亮度及对比度。

<图20>
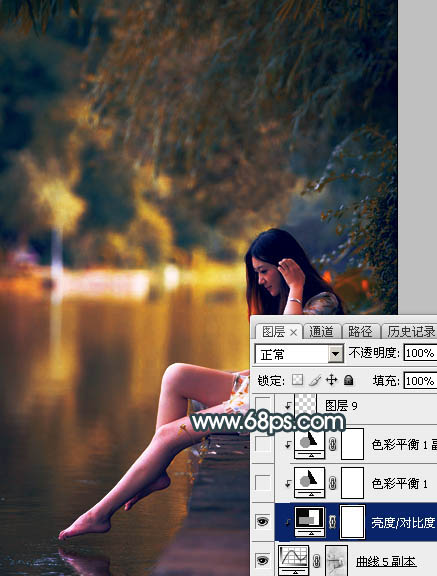
<图21>
8、创建色彩平衡调整图层,对阴影进行调整,参数设置如图22,确定后创建剪切蒙版,效果如图23。这一步给图片暗部增加蓝色。
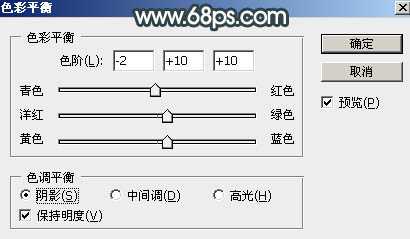
<图22>

<图23> 上一页12 下一页 阅读全文
原图

最终效果

1、打开原图素材大图,创建可选颜色调整图层,对黄、绿、青、白进行调整,参数设置如图1 - 4,效果如图5。这一步把图片中的黄绿色转为黄褐色。

<图1>

<图2>

<图3>

<图4>

<图5>
2、按Ctrl + J 把当前可选颜色调整图层复制一层,不透明度改为:20%,效果如下图。

<图6>
3、按Ctrl + Alt + 2 调出高光选区,然后创建曲线调整图层,对RGB、红、绿、蓝通道进行调整,参数设置如图7 - 10,效果如图11。这一步把高光区域大幅压暗,并增加明暗对比。

<图7>

<图8>

<图9>

<图10>

<图11>
4、创建可选颜色调整图层,对红、黄、白、中性色进行调整,参数设置如图12 - 15,确定后按Ctrl + Alt + G 创建剪切蒙版,效果如图16。这一步给图片高光区域增加橙红色。

<图12>

<图13>

<图14>

<图15>

<图16>
5、按Ctrl + Alt + 2 调出高光选区,按Ctrl + Shift + I 反选得到暗部选区,然后创建曲线调整图层,对红,蓝通道进行调整,参数及效果如下图。这一步适当简单暗部红色,并增加蓝色。

<图17>

<图18>
6、按Ctrl + J 把当前曲线调整图层复制一层,效果如下图。

<图19>
7、创建亮度/对比度调整图层,参数设置如图20,确定后创建剪切蒙版,效果如图21。这一步增加暗部亮度及对比度。

<图20>

<图21>
8、创建色彩平衡调整图层,对阴影进行调整,参数设置如图22,确定后创建剪切蒙版,效果如图23。这一步给图片暗部增加蓝色。

<图22>

<图23> 上一页12 下一页 阅读全文
下一篇:用PS给人物的衣服更换颜色