Photoshop将普通的外景人物照片调成淡淡的灰绿色
(编辑:jimmy 日期: 2026/6/24 浏览:3 次 )
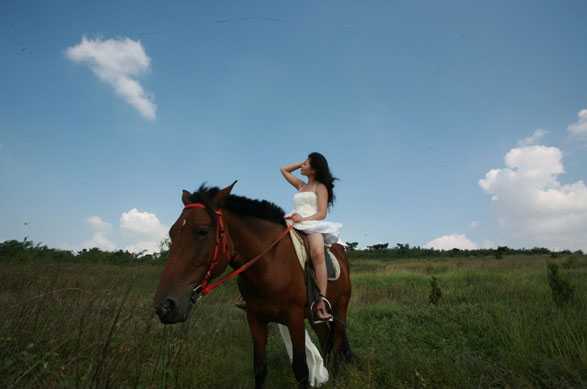
原图
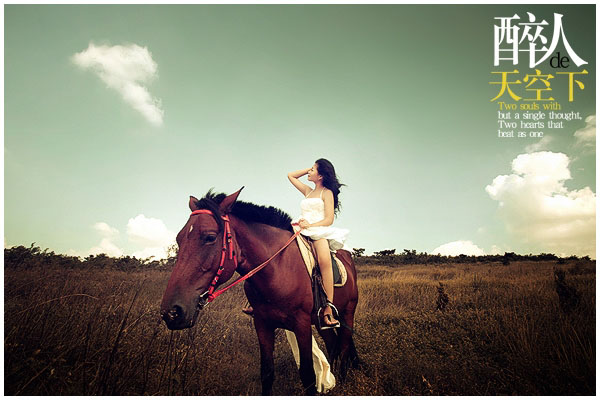
最终效果
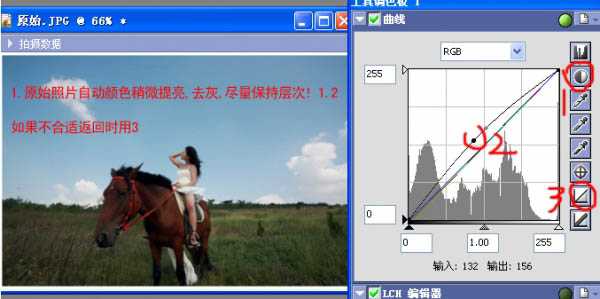
1、教程开始之前需要用Nikon Capture NX软件进行简单的调色处理。如果没有这款软件的可以去网上下载。先调整曲线,参数设置如下图。
2、进入基本调整 > 亮度和色度调整 > LCH编辑器,选择色调去掉蓝色和绿色。
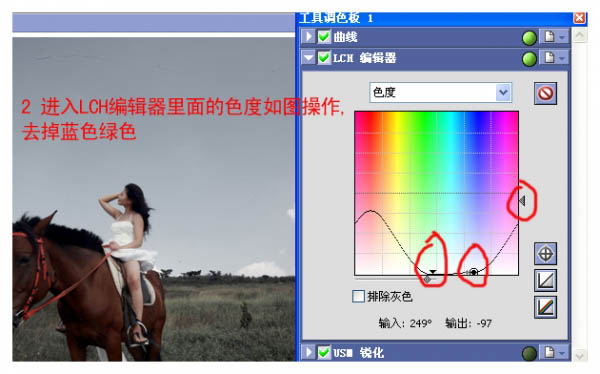
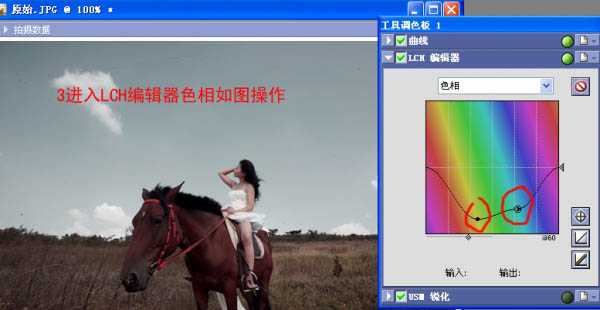
3、调整LCH中的色相,曲线设置如下图。
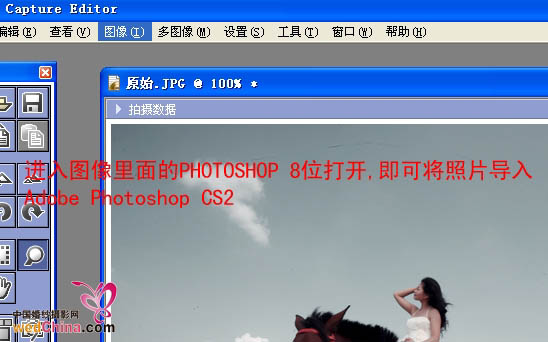
4、将图片保持,然后打开PS,导入刚才保存的图片。
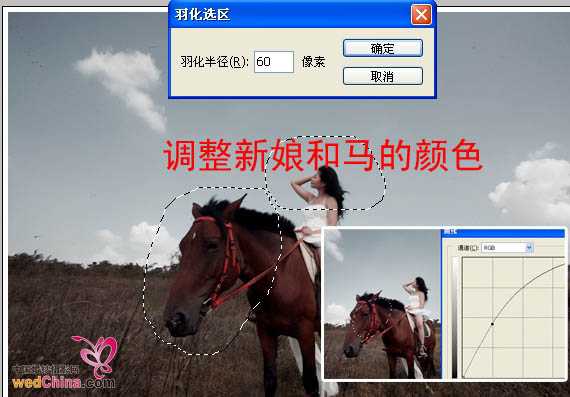
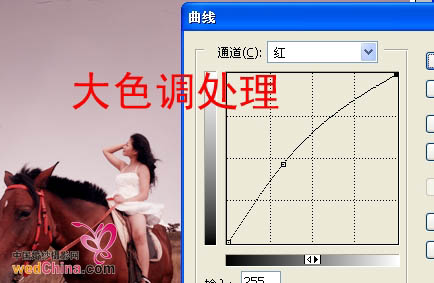
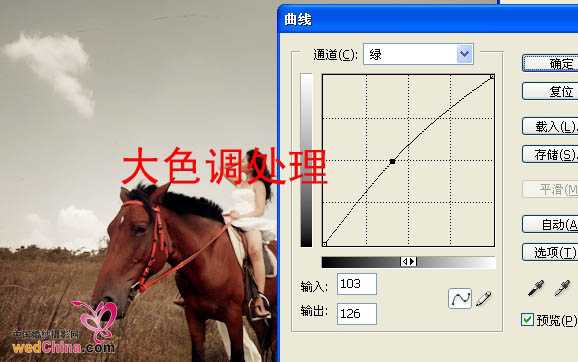
5、用套索工具选取马头及人物头部,如下图,按Ctrl + Alt + D 羽化60个像素后创建曲线调整图层,参数设置如下图。

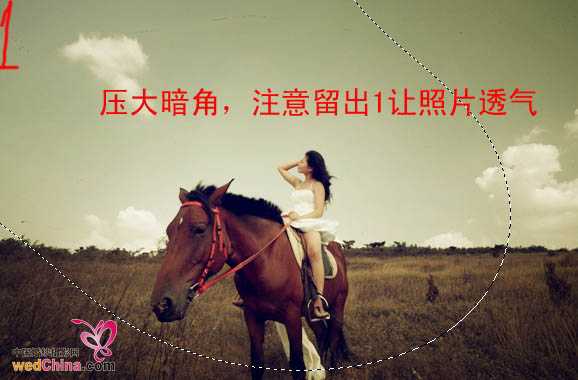
6、用套索工具把边角部分选取出来,适当羽化后创建曲线调整图层,适当调暗一点,效果如下图。
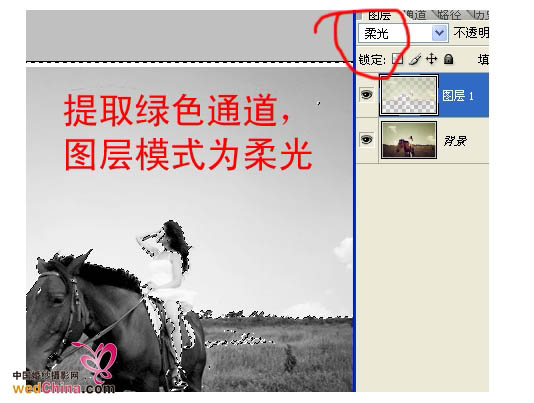
7、新建一个图层,按Ctrl + Alt + Shift + E 盖印图层。按Ctrl + Alt + 2 调出绿色通道高光选区,按Ctrl + J 把选区部分图像复制到新的图层,图层混合模式改为“柔光”。
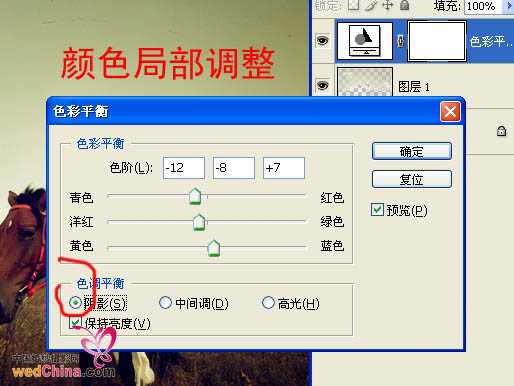
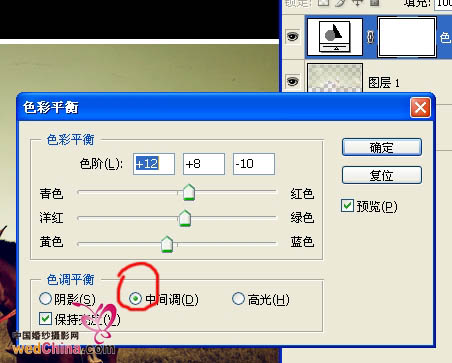
8、创建色彩平衡调整图层,参数设置如下图。
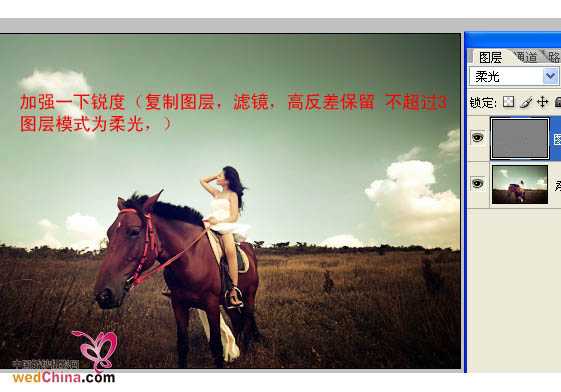
9、新建一个图层,盖印图层。执行:滤镜 > 其它 > 高反差保留,数值不超过3,确定后把图层混合模式改为“柔光”。
10、最后加上装饰文字,完成最终效果。
最终效果
1、教程开始之前需要用Nikon Capture NX软件进行简单的调色处理。如果没有这款软件的可以去网上下载。先调整曲线,参数设置如下图。
2、进入基本调整 > 亮度和色度调整 > LCH编辑器,选择色调去掉蓝色和绿色。
3、调整LCH中的色相,曲线设置如下图。
4、将图片保持,然后打开PS,导入刚才保存的图片。
5、用套索工具选取马头及人物头部,如下图,按Ctrl + Alt + D 羽化60个像素后创建曲线调整图层,参数设置如下图。
6、用套索工具把边角部分选取出来,适当羽化后创建曲线调整图层,适当调暗一点,效果如下图。
7、新建一个图层,按Ctrl + Alt + Shift + E 盖印图层。按Ctrl + Alt + 2 调出绿色通道高光选区,按Ctrl + J 把选区部分图像复制到新的图层,图层混合模式改为“柔光”。
8、创建色彩平衡调整图层,参数设置如下图。
9、新建一个图层,盖印图层。执行:滤镜 > 其它 > 高反差保留,数值不超过3,确定后把图层混合模式改为“柔光”。
10、最后加上装饰文字,完成最终效果。
下一篇:Photoshop 快速给美女照片磨皮美白方法