Photoshop 通透的液滴字效果
(编辑:jimmy 日期: 2026/6/26 浏览:3 次 )
来源:PConline 作者:李华仁
本教程介绍简单的液滴字效果的制作。为了突出效果,最好能给文字加上一些底纹背景。至于文字的颜色等可以按照实际需要灵活调整。
最终效果

1、打开Photoshop CS3软件,执行菜单:“文件”/“新建”(快捷键Ctrl+N),弹出新建对话框,设置名称:血液文字效果,宽度:800像素,高度:600像素,分辨率:72像素/英寸,颜色模式:RGB颜色、8位,背景内容:白色,设置完毕后单击确定按钮,如图1所示。

<图1>
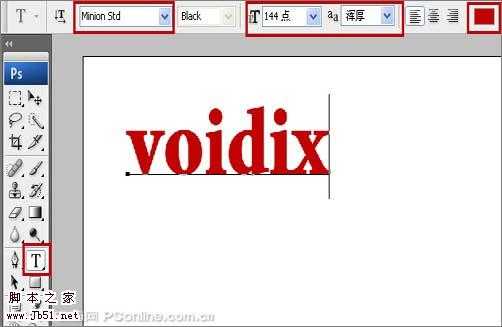
2、单击工具箱中的横排文字工具,输入voidox,然后按Ctrl+T切换字符和段落面板,设置字体:Mnion Std,大小:144点,颜色:红色,设置消除锯齿的方法:浑厚,如图2所示。
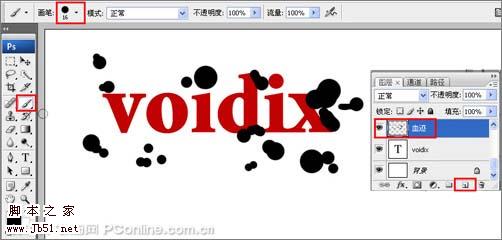
<图2> 3、在图层面板中点击新建图层按钮,新建一个命名为“血迹”,单击工具箱中画笔工具,在属性栏设置画笔为16,模式为正常,颜色为黑色,在工作区中画出血迹的形状,如图3所示。
<图3>
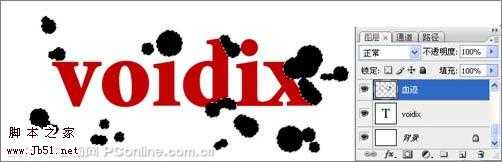
4、选中血迹图层,按住键盘中Ctrl不放,用鼠标左电击血迹图层转换为选区,如图4所示。
<图4>
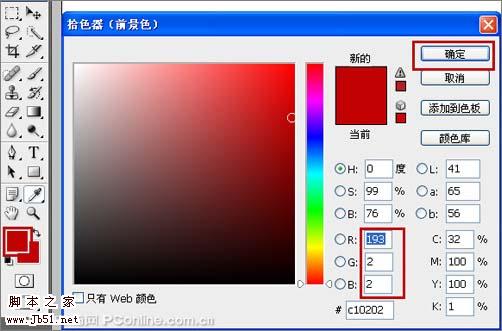
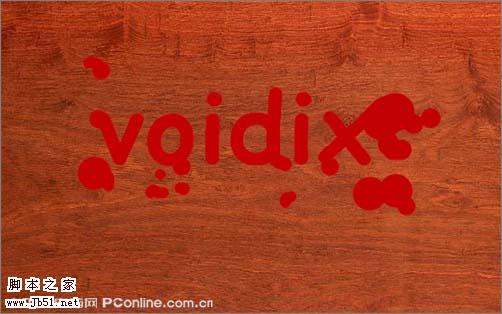
5、接着点击工具箱中的前景色图标,弹出拾色器,把前景色设置为红色(R:193,G:2,B:2),然后按快捷键Alt+Delete把背景填充前景色,如图5所示,效果如图6所示。
<图5>

<图6> 6、执行菜单:“文件”/“导入”,导入木板素材,调整其到适合的位置及大小,如图7所示。
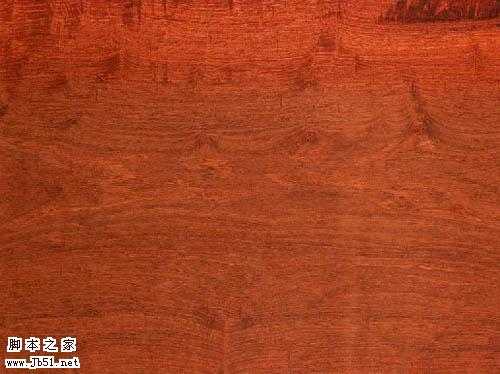
<木质素材>
<图7>
7、选择血迹图层,右击血迹文字图层,选择混合选项,进入到图层样式,勾选投影复选项,设置混合模式:正片叠加,点击色标处,弹出选择阴影的颜色窗口,设置为红色(R:190,G:3,B:3),不透明度:70%,距离:0像素,扩展:0%,大小:0像素,等高线为线性,然后点击确定按钮,如图8所示。
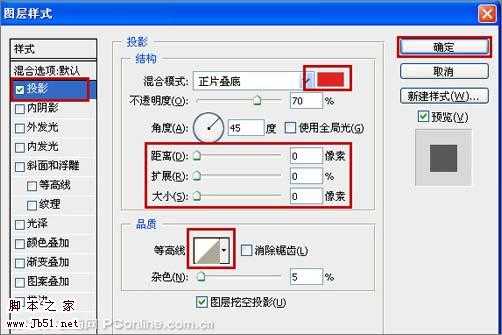
<图8> 8、勾选内阴影选项,设置混合模式为正片叠加,点击色标处,弹出选择阴影的颜色窗口,设置为红色(R:153,G:49,B:49),设置不透明度:85%,距离:11像素,大小:18像素,然后点击确定按钮,如图9所示。

<图9>
9、勾选外发光复选项,设置混合模式为滤色,设置不透明度:60%,点击发光颜色色标,弹出拾色器窗口。设置发光颜色:红色(R:252,G:68,B:72),如图10所示。
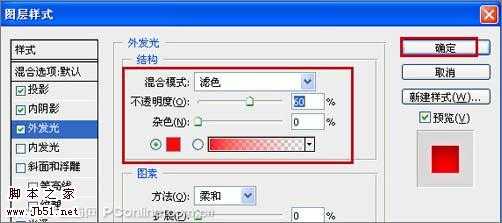
<图10>
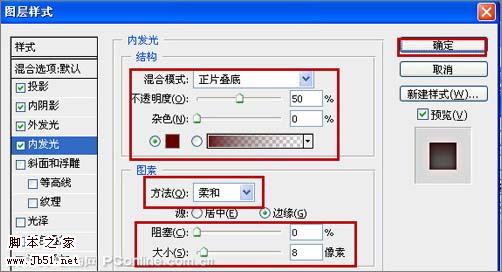
10、勾选内发光复选项,设置混合模式为正片叠底,设置不透明度为50%,再单击渐变颜色条,弹出渐变编辑器,设置左侧开始色标为深红色,右侧结束色标为白色,点击确定完成渐变颜色设置;在内发光复选项中,方法:为柔和设置阻塞:0%,大小:为8像素,,如图11所示。
<图11>
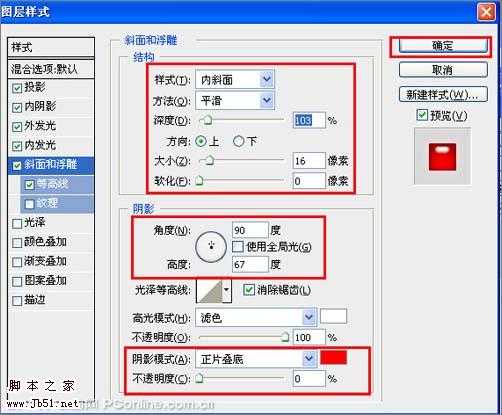
11、勾选斜面和浮雕复选项,设置样式:内斜面,方法:平滑,深度:103%,方向:下,大小:15像素,角度为90度,高度为67度,阴影模式为正片叠加,颜色为红色,设置完毕后单击确定按钮,如图12所示。
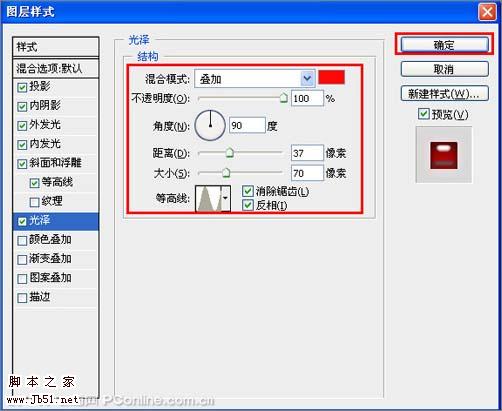
<图12> 12、勾选光泽选项,设置混合模式:叠加,不透明度:100%,距离:37像素,大小:70像素,等高线:环形,设置完毕后单击确定按钮,如图13所示。
<图13>
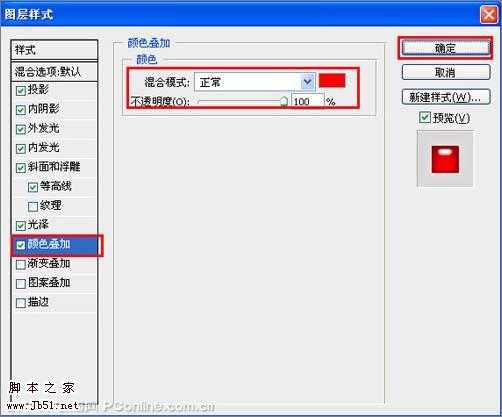
13、勾选颜色叠加选项,设置混合模式:正常,颜色为红色,不透明度:100%,设置完毕后单击确定按钮,如图14所示。
<图14>
14、调整后的效果图,也是最终效果图。如图15所示。

<图15>
本教程介绍简单的液滴字效果的制作。为了突出效果,最好能给文字加上一些底纹背景。至于文字的颜色等可以按照实际需要灵活调整。
最终效果
1、打开Photoshop CS3软件,执行菜单:“文件”/“新建”(快捷键Ctrl+N),弹出新建对话框,设置名称:血液文字效果,宽度:800像素,高度:600像素,分辨率:72像素/英寸,颜色模式:RGB颜色、8位,背景内容:白色,设置完毕后单击确定按钮,如图1所示。
<图1>
2、单击工具箱中的横排文字工具,输入voidox,然后按Ctrl+T切换字符和段落面板,设置字体:Mnion Std,大小:144点,颜色:红色,设置消除锯齿的方法:浑厚,如图2所示。
<图2> 3、在图层面板中点击新建图层按钮,新建一个命名为“血迹”,单击工具箱中画笔工具,在属性栏设置画笔为16,模式为正常,颜色为黑色,在工作区中画出血迹的形状,如图3所示。
<图3>
4、选中血迹图层,按住键盘中Ctrl不放,用鼠标左电击血迹图层转换为选区,如图4所示。
<图4>
5、接着点击工具箱中的前景色图标,弹出拾色器,把前景色设置为红色(R:193,G:2,B:2),然后按快捷键Alt+Delete把背景填充前景色,如图5所示,效果如图6所示。
<图5>
<图6> 6、执行菜单:“文件”/“导入”,导入木板素材,调整其到适合的位置及大小,如图7所示。
<木质素材>
<图7>
7、选择血迹图层,右击血迹文字图层,选择混合选项,进入到图层样式,勾选投影复选项,设置混合模式:正片叠加,点击色标处,弹出选择阴影的颜色窗口,设置为红色(R:190,G:3,B:3),不透明度:70%,距离:0像素,扩展:0%,大小:0像素,等高线为线性,然后点击确定按钮,如图8所示。
<图8> 8、勾选内阴影选项,设置混合模式为正片叠加,点击色标处,弹出选择阴影的颜色窗口,设置为红色(R:153,G:49,B:49),设置不透明度:85%,距离:11像素,大小:18像素,然后点击确定按钮,如图9所示。
<图9>
9、勾选外发光复选项,设置混合模式为滤色,设置不透明度:60%,点击发光颜色色标,弹出拾色器窗口。设置发光颜色:红色(R:252,G:68,B:72),如图10所示。
<图10>
10、勾选内发光复选项,设置混合模式为正片叠底,设置不透明度为50%,再单击渐变颜色条,弹出渐变编辑器,设置左侧开始色标为深红色,右侧结束色标为白色,点击确定完成渐变颜色设置;在内发光复选项中,方法:为柔和设置阻塞:0%,大小:为8像素,,如图11所示。
<图11>
11、勾选斜面和浮雕复选项,设置样式:内斜面,方法:平滑,深度:103%,方向:下,大小:15像素,角度为90度,高度为67度,阴影模式为正片叠加,颜色为红色,设置完毕后单击确定按钮,如图12所示。
<图12> 12、勾选光泽选项,设置混合模式:叠加,不透明度:100%,距离:37像素,大小:70像素,等高线:环形,设置完毕后单击确定按钮,如图13所示。
<图13>
13、勾选颜色叠加选项,设置混合模式:正常,颜色为红色,不透明度:100%,设置完毕后单击确定按钮,如图14所示。
<图14>
14、调整后的效果图,也是最终效果图。如图15所示。
<图15>
下一篇:Photoshop 肮脏有裂痕的金属文字