Photoshop查找边缘滤镜应用实例
(编辑:jimmy 日期: 2026/7/3 浏览:3 次 )
今天我们来介绍具体的实例——放射炫光。
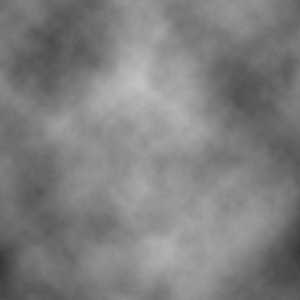
1、Photoshop新建图像,使用默认颜色执行【滤镜_渲染_云彩】,效果如下图。
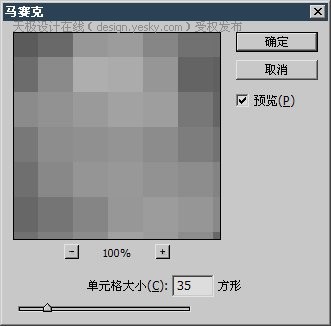
然后使用【滤镜_像素化_马赛克】,设定如下右图。
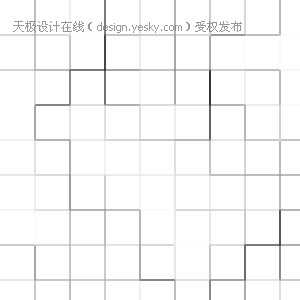
2、使用【滤镜_风格化_查找边缘】,效果如下图。
 -
-
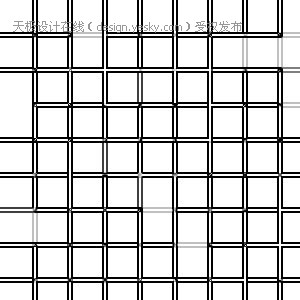
〖CTRL_F〗多次执行后得到类似下右图的效果。
 -
-
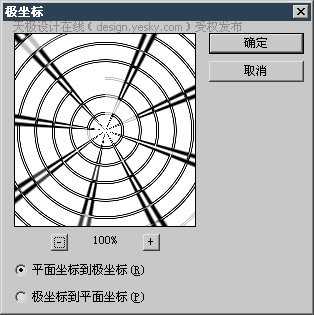
3、使用【滤镜_扭曲_极坐标】,设定如下图。
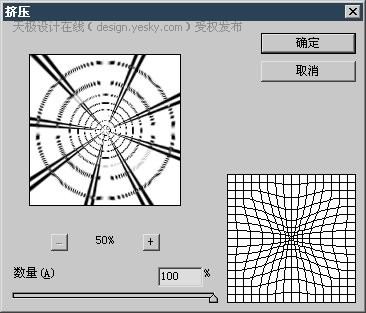
然后使用【滤镜_扭曲_挤压】,设定如下图。
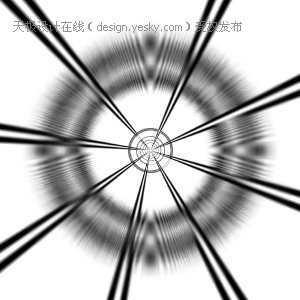
图像效果如下图。
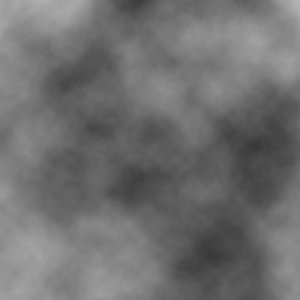
4、新建一个图层,使用【滤镜_渲染_云彩】,效果如下图。
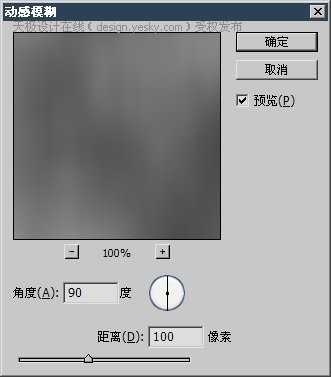
接着对其使用【滤镜_模糊_动感模糊】,设定如下图。
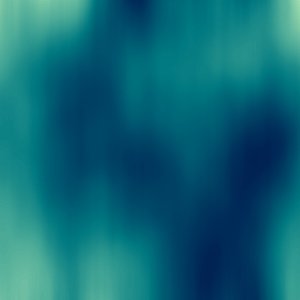
然后建立色彩平衡调整层,分别为阴影-65,0,55;中间调0,0,25;高光0,10,-60。开启“保持亮度”选项。调整后效果如下图。
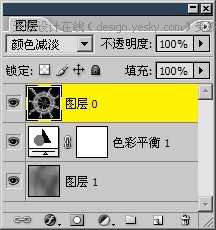
5、按住ALT键双击图层调板中的背景层转为普通图层,移动到最上层。〖CTRL_I〗将其反相。最后将混合模式改为“颜色减淡”。图层调板和效果分别如下2图。
 -
-
6、使用裁切工具截取部分画面。可参考如下各图。
 -
- -
-
总结:多次执行查找边缘滤镜,得到横竖线条的效果。不同于以往的径向模糊,而是通过极坐标滤镜营造放射效果。使用云彩滤镜制作背景则是比较常用的手法。最后恰当地使用裁切工具来截取部分画面,用作图标或广告条背景。
然后使用【滤镜_像素化_马赛克】,设定如下右图。
2、使用【滤镜_风格化_查找边缘】,效果如下图。
-〖CTRL_F〗多次执行后得到类似下右图的效果。
-3、使用【滤镜_扭曲_极坐标】,设定如下图。
然后使用【滤镜_扭曲_挤压】,设定如下图。
图像效果如下图。
4、新建一个图层,使用【滤镜_渲染_云彩】,效果如下图。
接着对其使用【滤镜_模糊_动感模糊】,设定如下图。
然后建立色彩平衡调整层,分别为阴影-65,0,55;中间调0,0,25;高光0,10,-60。开启“保持亮度”选项。调整后效果如下图。
5、按住ALT键双击图层调板中的背景层转为普通图层,移动到最上层。〖CTRL_I〗将其反相。最后将混合模式改为“颜色减淡”。图层调板和效果分别如下2图。
-6、使用裁切工具截取部分画面。可参考如下各图。
--总结:多次执行查找边缘滤镜,得到横竖线条的效果。不同于以往的径向模糊,而是通过极坐标滤镜营造放射效果。使用云彩滤镜制作背景则是比较常用的手法。最后恰当地使用裁切工具来截取部分画面,用作图标或广告条背景。
下一篇:Photoshop绘制3D立体发光箭头