photoshop设计制作出Iphone应用图标教程
(编辑:jimmy 日期: 2026/7/12 浏览:3 次 )
借着圣诞节到来,这次用photoshop制一个简单的圣诞iphone icon,整个过程利用photoshop的矢量功能结合位图功能完成(什么?别告诉我你不知道photoshop矢量的强大!),这篇文章很简单,对!是文章不是教程(不敢说是教程),主要是介绍photoshop中矢量在icon的应用和一些小细节(细节决定成败这是错不了的)。当然高手看一眼最终效果就知道如何制作了,好吧,这是写给高手娱乐的……
废话不多说,这是最终效果

用圆角矩形工具画出长宽为512px,R值为92px的标准iphone框架

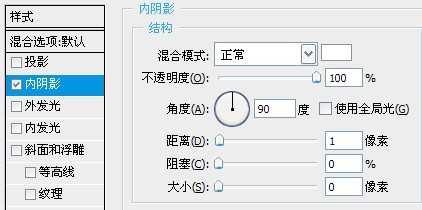
加上1px内阴影效果,使其有立体感
再用图案叠加添加木纹图案,你可以google好看的木纹图案,这里我就用自带的木纹了

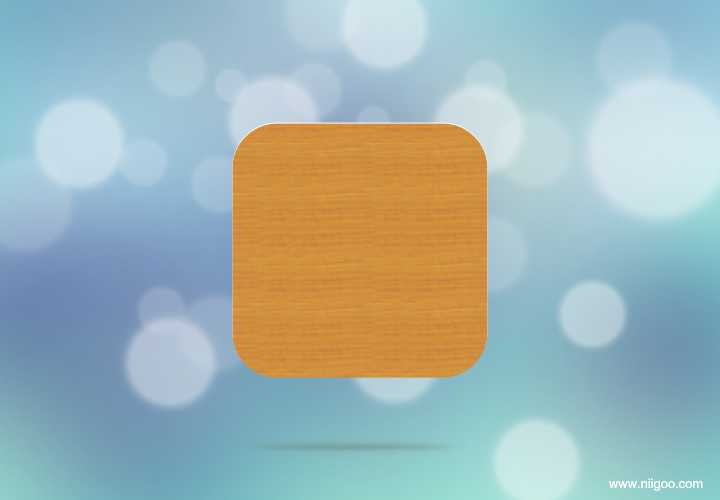
添加一个圆角矩形图层

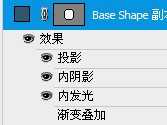
设置投影、内阴影、内发光效果进一步加强立体感

添加niigoo主体渐变色和描边,你也可以自已发挥,描边是使外部木边更有立体感,这就是细节的体现了

接着到围脖的部份,新建图层,用钢笔画出围脖,主体选用红色,添加图层阴影效果
围脖图层1

围脖图层2

围脖图层3
注意图层的顺序

再用钢笔画出围脖阴影,画好了用滤镜进行高斯模糊

用毛笔添加亮面和暗面,方法:这里可以在围脖图层1上面新建一图层,右键-创建剪贴蒙板,然后这图层就嵌入围脖图层1里了,再用毛笔画亮面和暗面,不怕出边了

其它围脖块用上述同样方法画出亮面和暗面

添加围脖波点
这里也是使用创建剪贴蒙板的方法,先用椭圆工具画出波点,再把波点图层嵌入围脖图层里


整理好图层,三层围脖完成了
回过头来检查图层,噢~~~一切就是这么整体

再来就是加上“尼果”俩字(出处表明,哈哈)

好了,在底部再添加一个反光图层就完成了

如果是iphone上使用,可以整体缩放到114*114px的尺寸,ipad是72*72px
我已经放到niigoo.com上,有iphone、ipad的童鞋可以保存主页到桌面上看一下最终效果!

废话不多说,这是最终效果
用圆角矩形工具画出长宽为512px,R值为92px的标准iphone框架
加上1px内阴影效果,使其有立体感
再用图案叠加添加木纹图案,你可以google好看的木纹图案,这里我就用自带的木纹了
添加一个圆角矩形图层
设置投影、内阴影、内发光效果进一步加强立体感
添加niigoo主体渐变色和描边,你也可以自已发挥,描边是使外部木边更有立体感,这就是细节的体现了
接着到围脖的部份,新建图层,用钢笔画出围脖,主体选用红色,添加图层阴影效果
围脖图层1
围脖图层2
围脖图层3
注意图层的顺序
再用钢笔画出围脖阴影,画好了用滤镜进行高斯模糊
用毛笔添加亮面和暗面,方法:这里可以在围脖图层1上面新建一图层,右键-创建剪贴蒙板,然后这图层就嵌入围脖图层1里了,再用毛笔画亮面和暗面,不怕出边了
其它围脖块用上述同样方法画出亮面和暗面
添加围脖波点
这里也是使用创建剪贴蒙板的方法,先用椭圆工具画出波点,再把波点图层嵌入围脖图层里
整理好图层,三层围脖完成了
回过头来检查图层,噢~~~一切就是这么整体
再来就是加上“尼果”俩字(出处表明,哈哈)
好了,在底部再添加一个反光图层就完成了
如果是iphone上使用,可以整体缩放到114*114px的尺寸,ipad是72*72px
我已经放到niigoo.com上,有iphone、ipad的童鞋可以保存主页到桌面上看一下最终效果!
下一篇:各地创意标志精选