photoshop合成深幽的古堡中心寒的美女图片
(编辑:jimmy 日期: 2026/7/10 浏览:3 次 )
最终效果

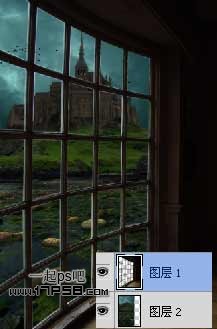
1、首先打开阳台图片,用直线套索将玻璃抠出删除,只留窗框。
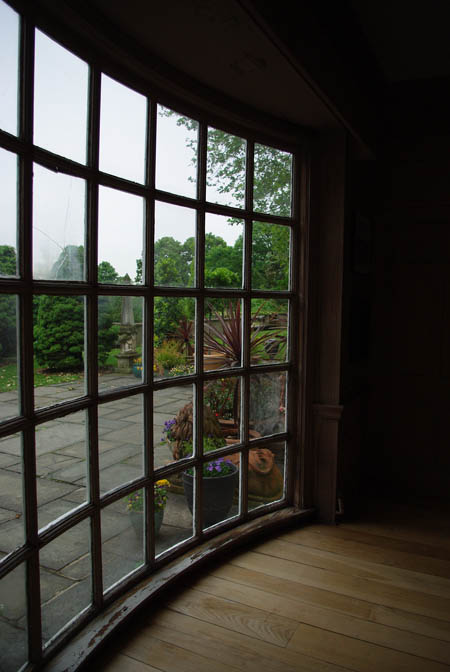
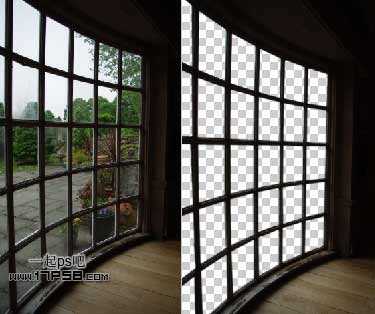
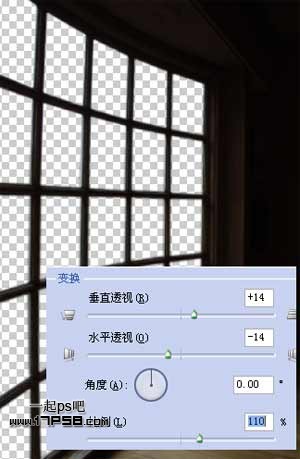
2、因为这个透视不太好,所以滤镜 > 镜头校正。
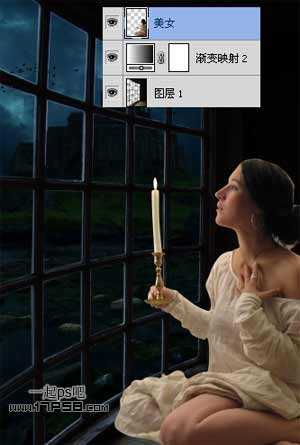
3、导入城堡图片放于窗户底层。
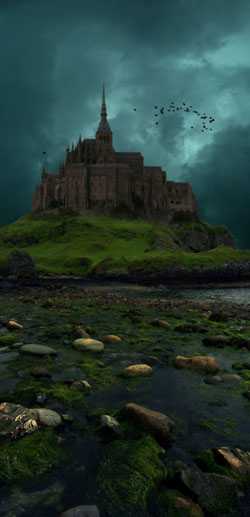
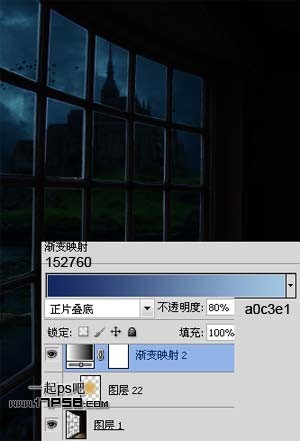
4、给城堡添加渐变映射调整层加深黑夜气氛。
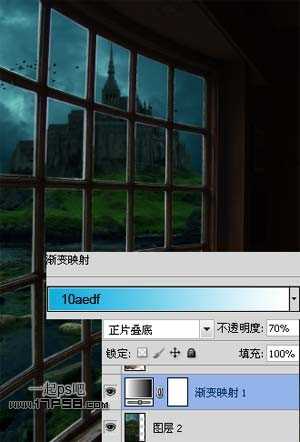
5、同样方法处理窗户层,图层模式正片叠底,不透明度80%。
6、用钢笔抠出美女,头发部分不用管,因为后期处理中那背光区域几乎是黑的。
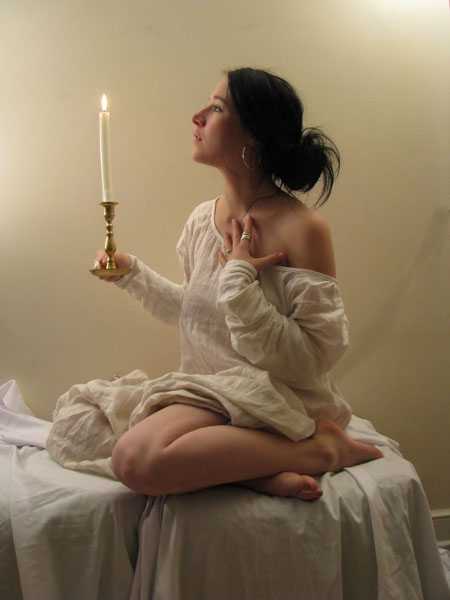
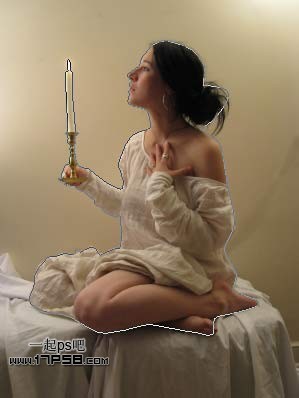
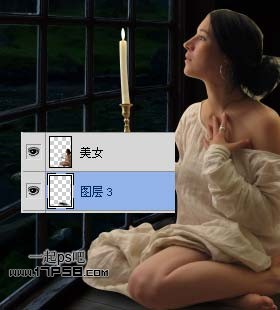
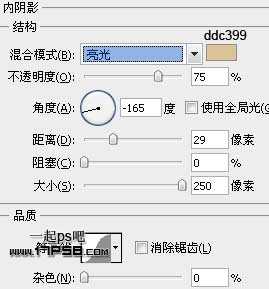
7、拖入文档中,缩小,位置如下,改名美女。
8、底部新建图层,用黑色柔角笔刷涂抹一些美女的阴影。
9、蜡烛光照效果,我们用图层样式来模拟,复制美女层,填充归零,图层内阴影样式。
上一页12 下一页 阅读全文
1、首先打开阳台图片,用直线套索将玻璃抠出删除,只留窗框。
2、因为这个透视不太好,所以滤镜 > 镜头校正。
3、导入城堡图片放于窗户底层。
4、给城堡添加渐变映射调整层加深黑夜气氛。
5、同样方法处理窗户层,图层模式正片叠底,不透明度80%。
6、用钢笔抠出美女,头发部分不用管,因为后期处理中那背光区域几乎是黑的。
7、拖入文档中,缩小,位置如下,改名美女。
8、底部新建图层,用黑色柔角笔刷涂抹一些美女的阴影。
9、蜡烛光照效果,我们用图层样式来模拟,复制美女层,填充归零,图层内阴影样式。
上一页12 下一页 阅读全文
下一篇:photoshop合成恐怖幽灵稻草人效果