photoshop经典合成雨夜中失落的天使
(编辑:jimmy 日期: 2026/7/16 浏览:3 次 )
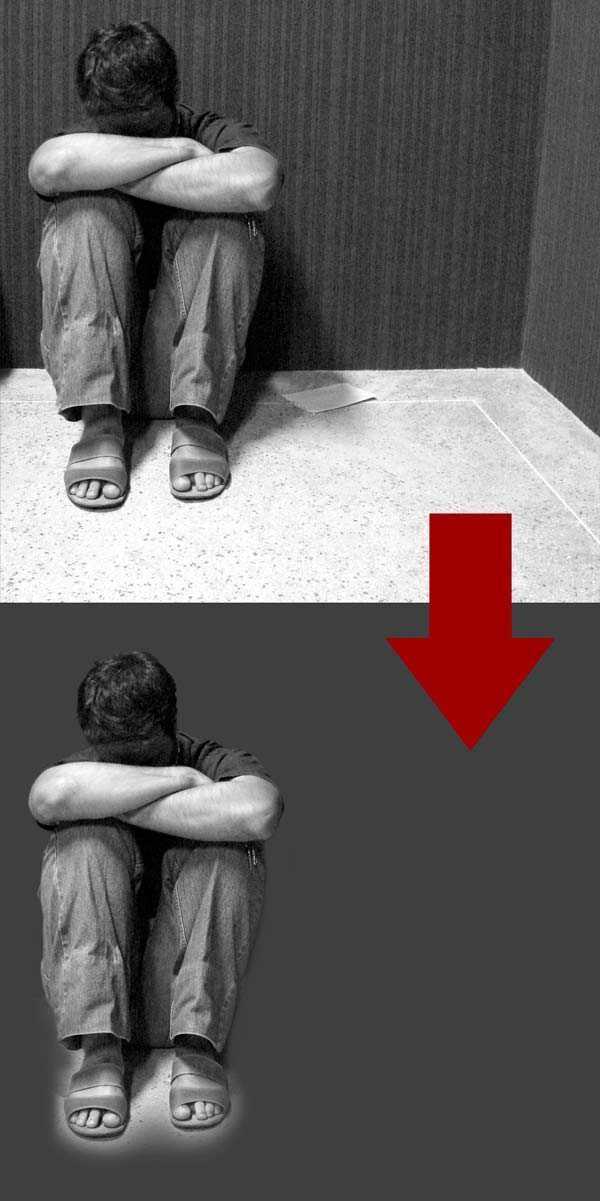
最终效果

1、新建一个A4(210mm x 297mm) 尺寸的文件,分辨率为300dpi。填充深灰色(# 424242)。
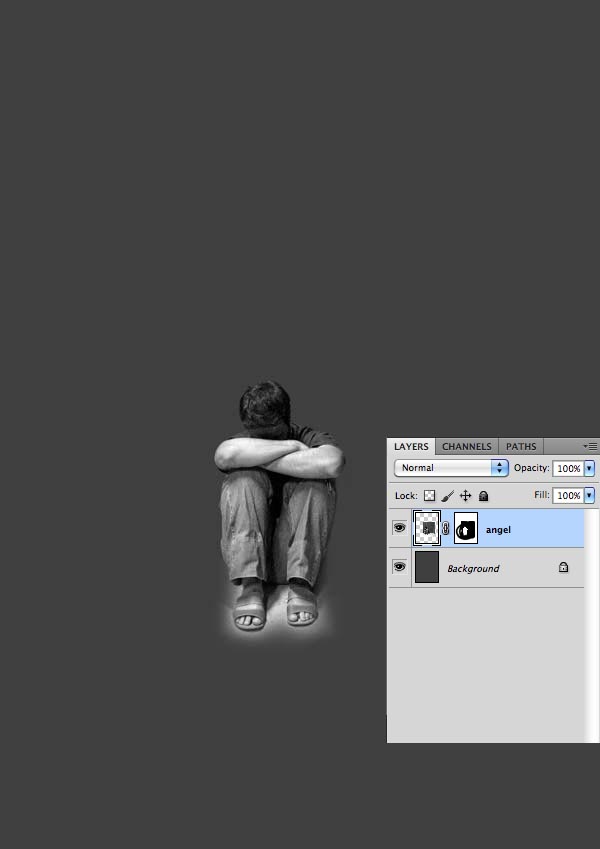
2、创建好背景后,第一步要做的是用你最喜欢的工具把这个男孩给抠出来。我用多边形套索工具(L)创建了一个选区,并添加了蒙版。选区不需要特别精确,因为这个男孩之后会与其他图片融合在一起。
在男孩的双脚附近你可以保留一些细节,比如他两腿间的阴影,多余的部分用一个软笔刷(B)擦除。
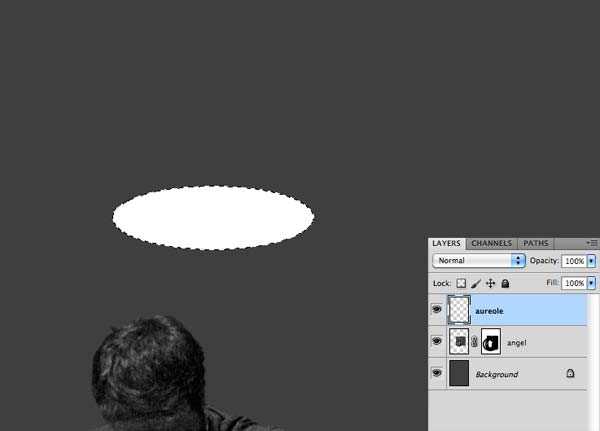
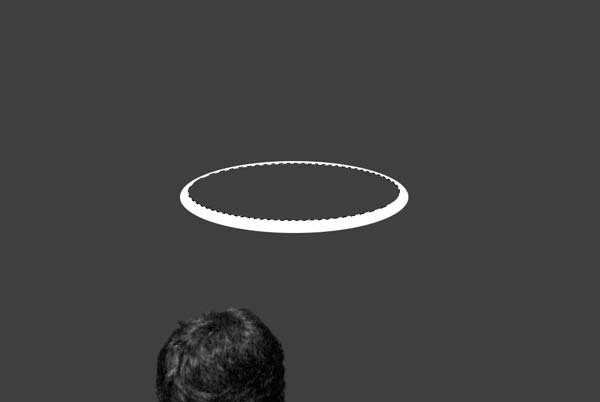
3、现在我们为天使创建一个光环。新建图层命名为“aureole”,用椭圆形选框工具(M)创建一个椭圆选区,填充白色。
4、在光环内部创建另外一个选区,并删除其中的部分。你会得到像这样的东西。
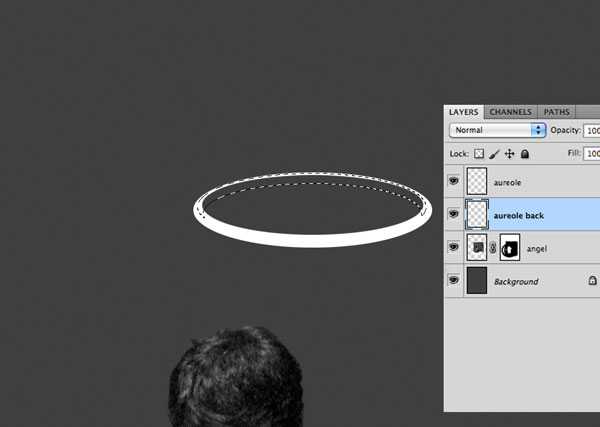
5、现在我们需要创建光环的内部了。新建图层,将它放在“aureole”层的下方,命名为“aureole back”。创建一个椭圆选区并填充浅灰(# b0b0b0)。

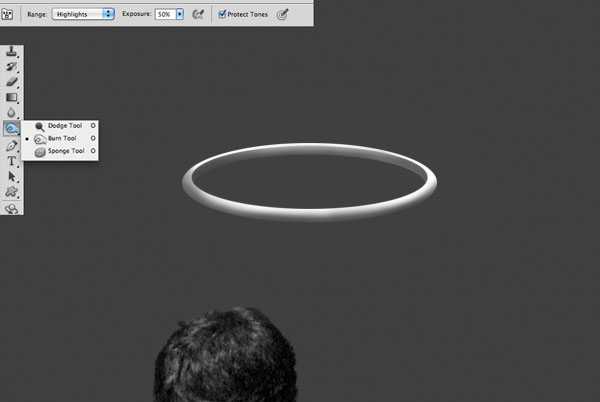
6、用加深工具(O),高光范围,为光环制作高光和阴影。最终你会得到和下图类似的图像。之后,将两个光环的图层打组,以保持图层文件层次整洁。

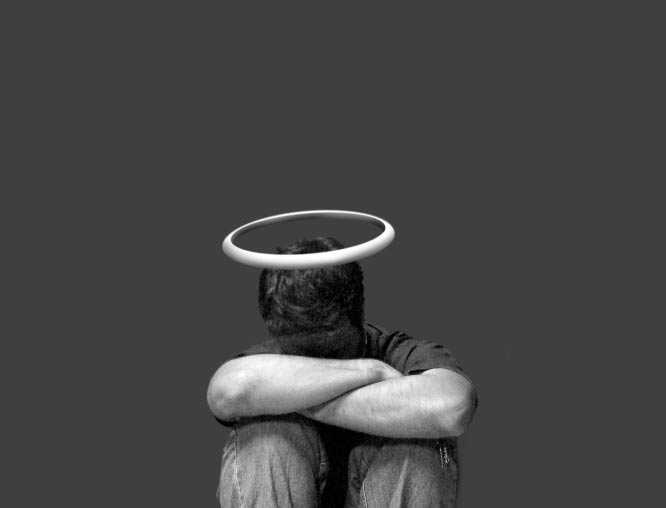
7、将光环摆在天使的头顶。
上一页12 3 下一页 阅读全文
1、新建一个A4(210mm x 297mm) 尺寸的文件,分辨率为300dpi。填充深灰色(# 424242)。
2、创建好背景后,第一步要做的是用你最喜欢的工具把这个男孩给抠出来。我用多边形套索工具(L)创建了一个选区,并添加了蒙版。选区不需要特别精确,因为这个男孩之后会与其他图片融合在一起。
在男孩的双脚附近你可以保留一些细节,比如他两腿间的阴影,多余的部分用一个软笔刷(B)擦除。
3、现在我们为天使创建一个光环。新建图层命名为“aureole”,用椭圆形选框工具(M)创建一个椭圆选区,填充白色。
4、在光环内部创建另外一个选区,并删除其中的部分。你会得到像这样的东西。
5、现在我们需要创建光环的内部了。新建图层,将它放在“aureole”层的下方,命名为“aureole back”。创建一个椭圆选区并填充浅灰(# b0b0b0)。
6、用加深工具(O),高光范围,为光环制作高光和阴影。最终你会得到和下图类似的图像。之后,将两个光环的图层打组,以保持图层文件层次整洁。
7、将光环摆在天使的头顶。
上一页12 3 下一页 阅读全文
下一篇:photoshop合成奇幻的飞龙谷