photoshop合成通往天堂之门
(编辑:jimmy 日期: 2026/7/16 浏览:3 次 )
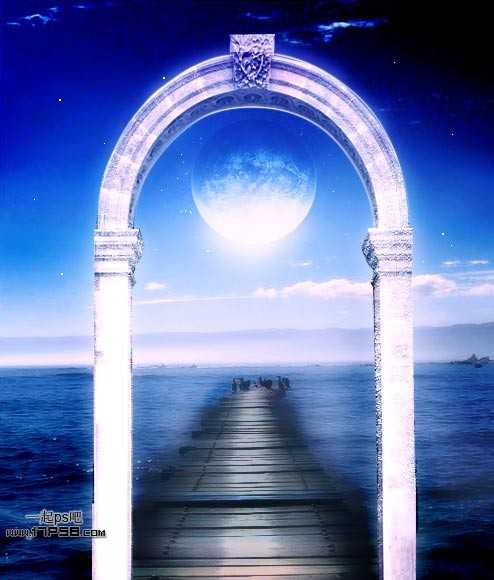
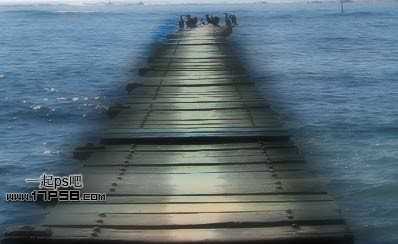
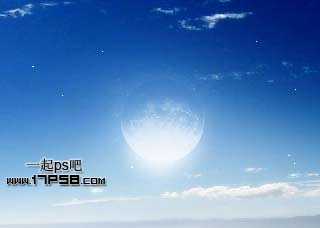
最终效果
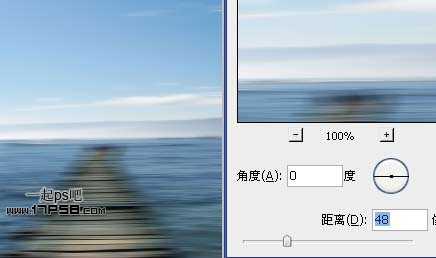
1、打开海天素材,ctrl+J复制一层,滤镜 > 模糊 > 动感模糊。

2、滤镜 > 模糊 > 高斯模糊3.5像素。

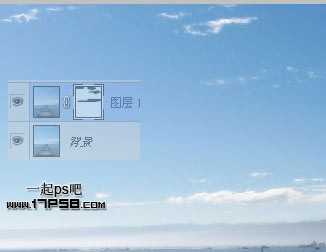
3、添加蒙版,用黑色笔刷涂抹,将背景层云彩露出来。
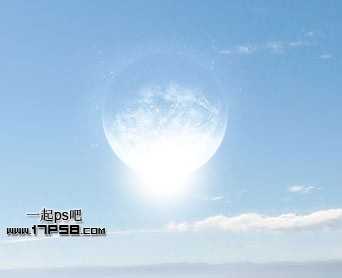
4、将地球素材拖入,图层模式滤色,添加蒙版,用黑色柔角笔刷涂抹删除多余部分。


5、用减淡工具涂抹月亮底部,使之更亮。

6、建新层,用大口径柔角白色笔刷在月亮底部点一下。
7、用减淡工具提亮桥的中间区域,作为月光的反射路径。

8、用加深工具加深桥的2侧。
9、复制背景层,挪到图层顶部,图层模式线性加深,添加蒙版用黑色柔角笔刷涂抹,ctrl+J复制一层,图层模式改为正片叠底。

10、建新层,用白色笔刷添加一些星星。
上一页12 下一页 阅读全文
1、打开海天素材,ctrl+J复制一层,滤镜 > 模糊 > 动感模糊。
2、滤镜 > 模糊 > 高斯模糊3.5像素。
3、添加蒙版,用黑色笔刷涂抹,将背景层云彩露出来。
4、将地球素材拖入,图层模式滤色,添加蒙版,用黑色柔角笔刷涂抹删除多余部分。
5、用减淡工具涂抹月亮底部,使之更亮。
6、建新层,用大口径柔角白色笔刷在月亮底部点一下。
7、用减淡工具提亮桥的中间区域,作为月光的反射路径。
8、用加深工具加深桥的2侧。
9、复制背景层,挪到图层顶部,图层模式线性加深,添加蒙版用黑色柔角笔刷涂抹,ctrl+J复制一层,图层模式改为正片叠底。
10、建新层,用白色笔刷添加一些星星。
上一页12 下一页 阅读全文
下一篇:photoshop合成神圣的雕像教程