photoshop鼠绘清爽的卡通美女插画效果
(编辑:jimmy 日期: 2026/7/17 浏览:3 次 )
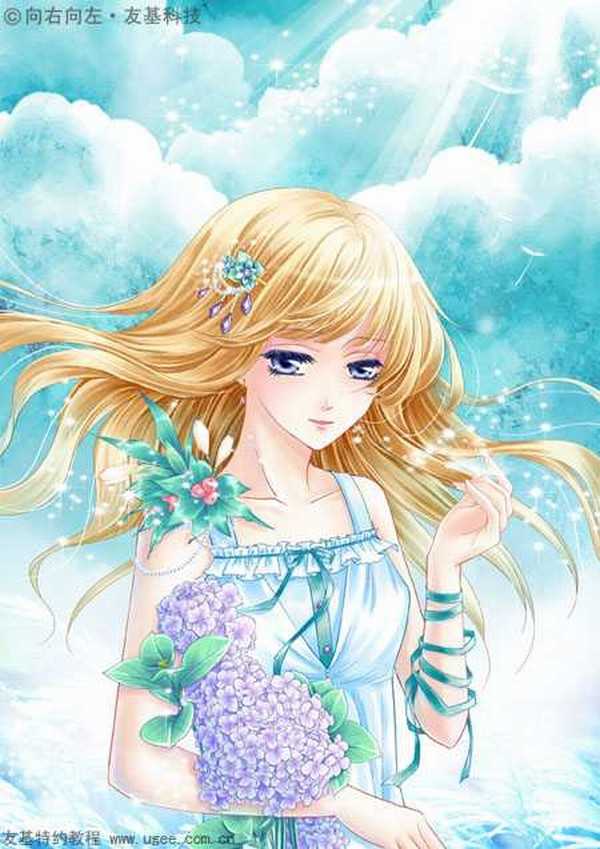
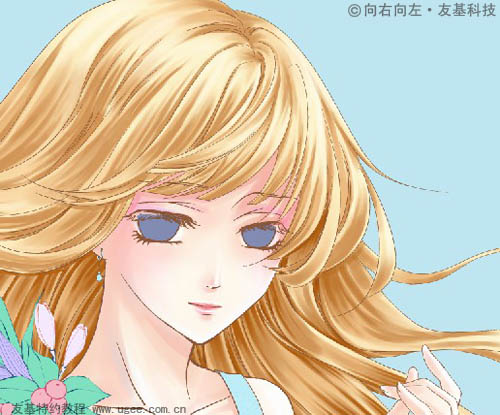
最终效果
1、这次的教程图是一张封面插图,编辑要求画面的主体为一女孩的上半身。由于画面的上方需要放杂志的标题,所以我们事先要留出足够的空间。画完草图后开始勾线,勾线的软件有很多,大家可以根据自己的喜好来选择,偶个人习惯用的是CS。
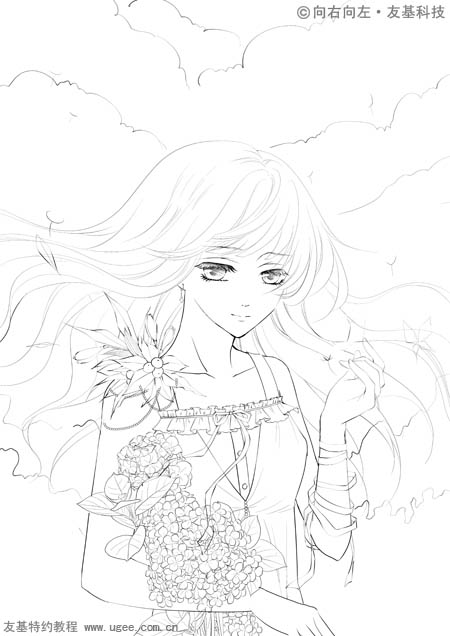
2、勾完线后,导出PSD格式的分层文件,然后在Photoshop中打开。先将线稿的颜色调整一下,然后使用多边形套索工具在线稿下方建色块。填色块时要仔细点,注意分层。

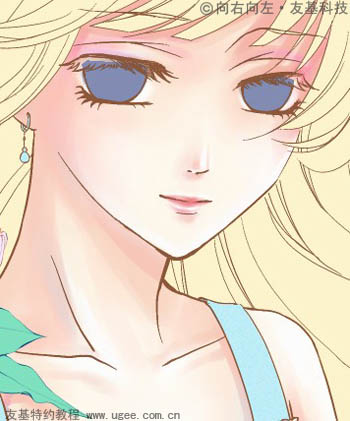
3、开始上色,首先是皮肤。先用喷笔画出皮肤大致的明暗关系,然后再画出阴影、高光和反光。
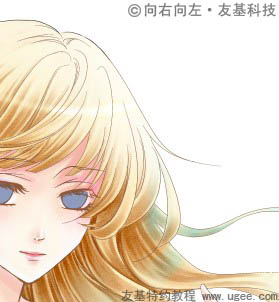
4、头发上色时也要一层一层地逐层加深。上色时要沉住气,把发丝的感觉画出来。
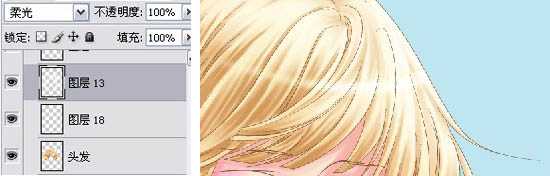
5、在头发的上方新建图层,并将图层模式改为【柔光】,给头发加上高光。
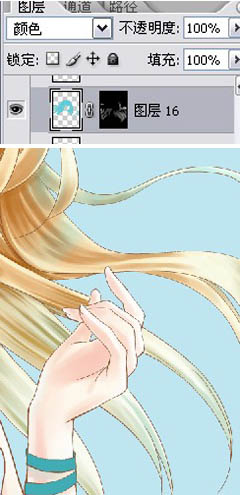
6、再新建图层,将图层模式改为【颜色】,给头发的下方加上一些青色调。
7、复制头发图层,执行【滤镜】-【杂色】-【添加杂点】,给这个复制出来的头发图层填上杂点,然后把图层模式改成【颜色加深】。
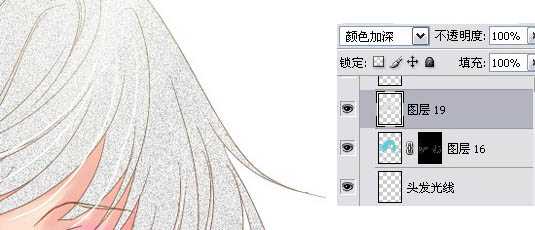
8、这样操作以后,头发就变得更有质感了。
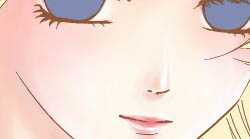
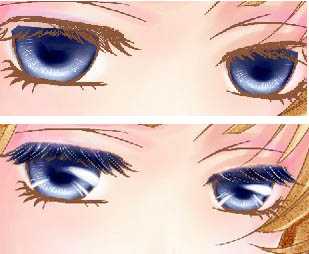
9、然后画出眼睛,眼神的部分就要通过高光来体现了。
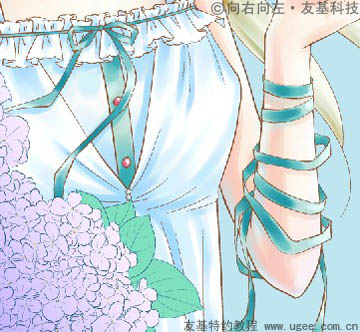
10、新建图层,开始画衣服,利用数位板的压感画出衣服的褶皱感。
上一页12 下一页 阅读全文
1、这次的教程图是一张封面插图,编辑要求画面的主体为一女孩的上半身。由于画面的上方需要放杂志的标题,所以我们事先要留出足够的空间。画完草图后开始勾线,勾线的软件有很多,大家可以根据自己的喜好来选择,偶个人习惯用的是CS。
2、勾完线后,导出PSD格式的分层文件,然后在Photoshop中打开。先将线稿的颜色调整一下,然后使用多边形套索工具在线稿下方建色块。填色块时要仔细点,注意分层。
3、开始上色,首先是皮肤。先用喷笔画出皮肤大致的明暗关系,然后再画出阴影、高光和反光。
4、头发上色时也要一层一层地逐层加深。上色时要沉住气,把发丝的感觉画出来。
5、在头发的上方新建图层,并将图层模式改为【柔光】,给头发加上高光。
6、再新建图层,将图层模式改为【颜色】,给头发的下方加上一些青色调。
7、复制头发图层,执行【滤镜】-【杂色】-【添加杂点】,给这个复制出来的头发图层填上杂点,然后把图层模式改成【颜色加深】。
8、这样操作以后,头发就变得更有质感了。
9、然后画出眼睛,眼神的部分就要通过高光来体现了。
10、新建图层,开始画衣服,利用数位板的压感画出衣服的褶皱感。
上一页12 下一页 阅读全文
下一篇:photoshop鼠绘出古典聊斋故事中的九尾狐精效果