photoshop鼠绘出漂亮的民国美少女卡通画效果
(编辑:jimmy 日期: 2026/7/24 浏览:3 次 )
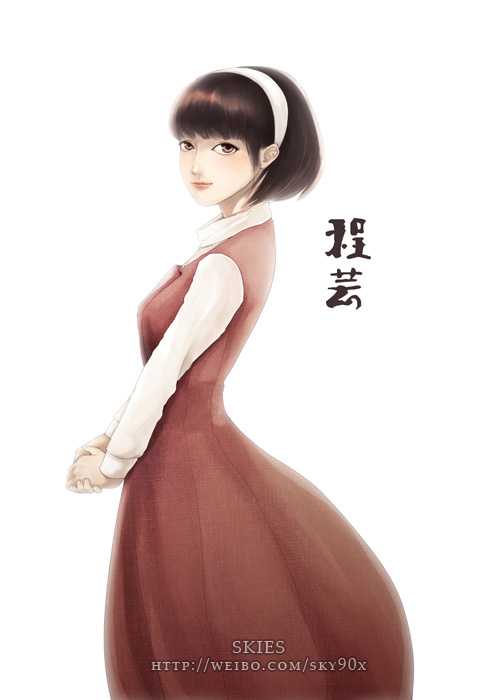
最终效果
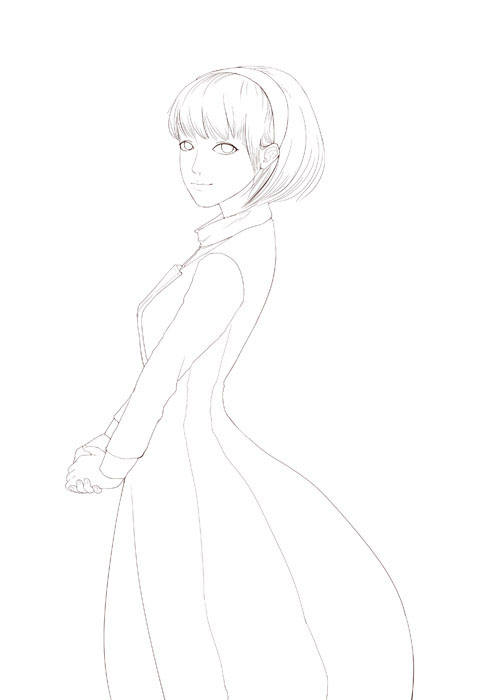
1、我是用sai起的线稿,因为SAI的铅笔工具起线稿比较流畅。其实并不是说一定要用那个工具跟软件,或者用那个软件比较好。只是看你的个人习惯,你觉得画得舒服,能达到你的效果就可以了。
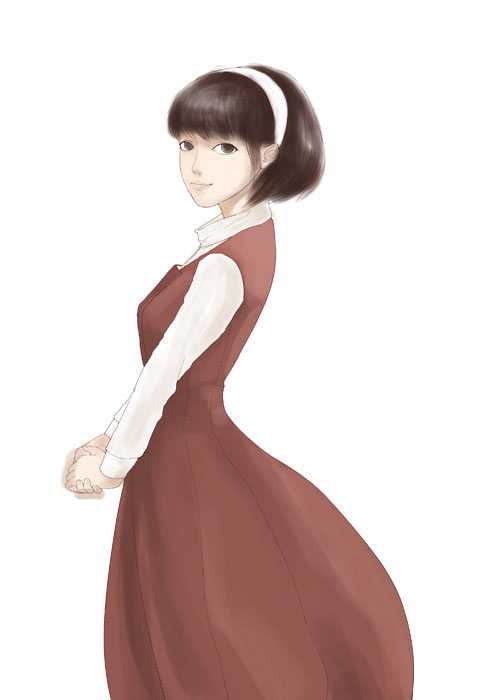
2、接下来是对人物的铺色,这个也是为了确定一下人物的色彩搭配,这样在接下来的上色不会太被动。
3、接下来就是逐个的深入,我比较喜欢从眼睛开始。

4、接下来是脸部跟手部的皮肤。

5、头发的深入。头发的高光部分可以用提亮工具提亮。

6、白色发箍跟白色打底衣的深入。

7、衣服叠加了布料纹理,然后对暗部跟亮部进行加强一下。

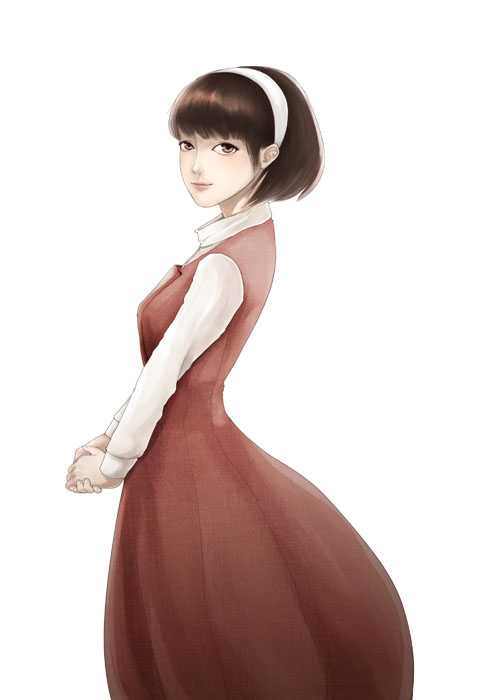
8、对衣服跟人物进行整体的调整。
9、用通道对色彩进行统一。然后在边缘绘制一层柔光。完成最终效果。

1、我是用sai起的线稿,因为SAI的铅笔工具起线稿比较流畅。其实并不是说一定要用那个工具跟软件,或者用那个软件比较好。只是看你的个人习惯,你觉得画得舒服,能达到你的效果就可以了。
2、接下来是对人物的铺色,这个也是为了确定一下人物的色彩搭配,这样在接下来的上色不会太被动。
3、接下来就是逐个的深入,我比较喜欢从眼睛开始。
4、接下来是脸部跟手部的皮肤。
5、头发的深入。头发的高光部分可以用提亮工具提亮。
6、白色发箍跟白色打底衣的深入。
7、衣服叠加了布料纹理,然后对暗部跟亮部进行加强一下。
8、对衣服跟人物进行整体的调整。
9、用通道对色彩进行统一。然后在边缘绘制一层柔光。完成最终效果。
下一篇:Photoshop鼠绘制出海盗角色效果