Photoshop打造红外线风格外景婚片
(编辑:jimmy 日期: 2026/6/23 浏览:3 次 )
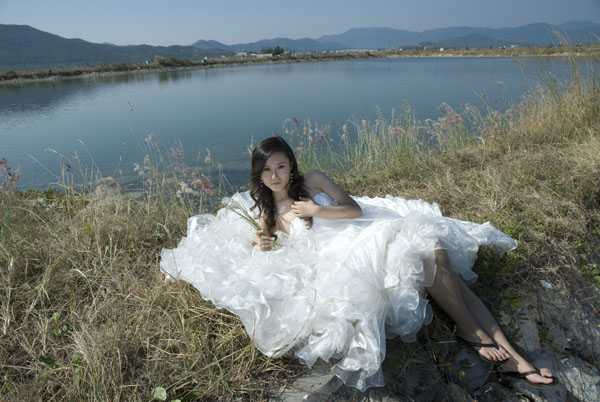
原图
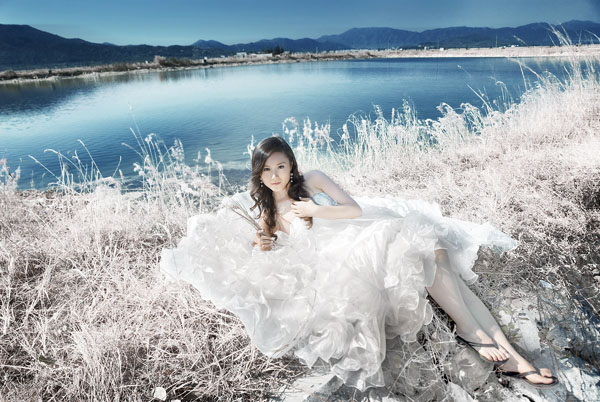
最终效果
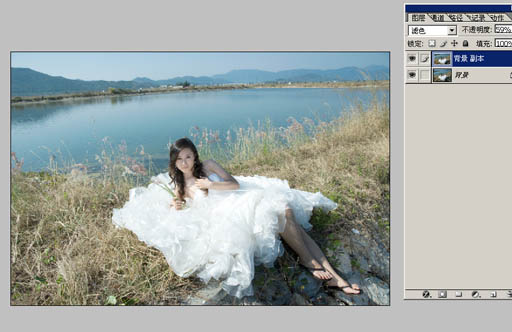
1、打开原片,并复制图层。
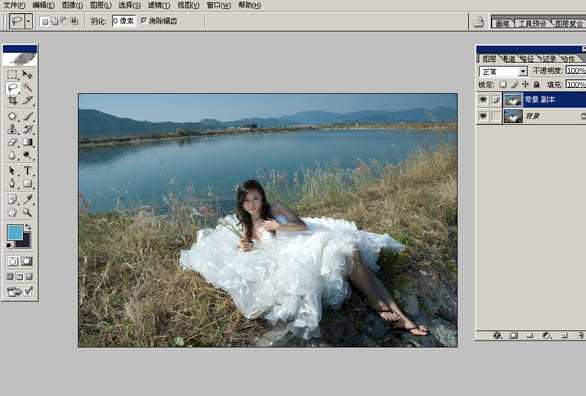
2、将图层模式更改为滤色,不透明度为59%。
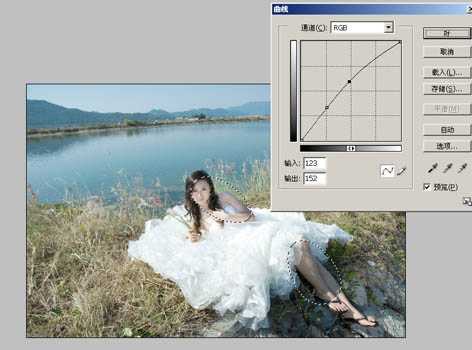
3、合并图层,用索套选取工具分别在人物脸上和腿上较暗的地方做选区。并适当羽化,羽化值为150像素,用曲线将选区内图片适当提亮,效果如图所示:
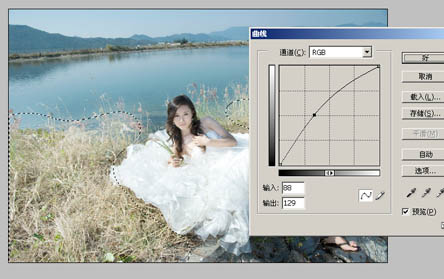
4、用索套选取工具在较暗的草地上做选区,羽化值为150像素,用曲线将选区。内图片适当提亮,效果如图所示:
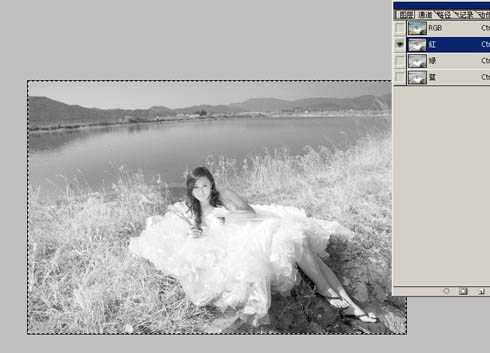
5、进入通道--红色通道,执行快捷键Ctrl+a全选,然后再按快捷键Ctrl+c复制。
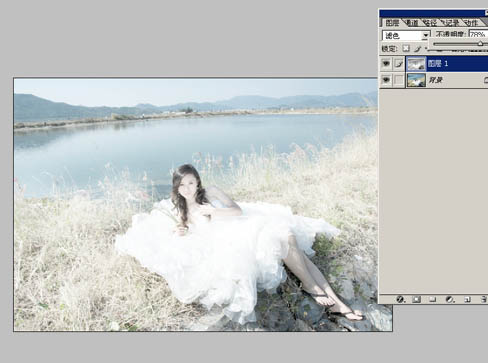
6、新建图层,执行快捷键Ctrl+v粘贴,图层模式为滤色,不透明度为78%。
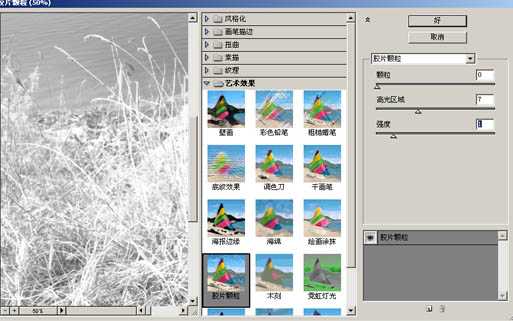
7、在图层1上执行滤镜/艺术效果/胶片颗粒,参数如图所示:颗粒:0,高光区域:7 ,强度:1。
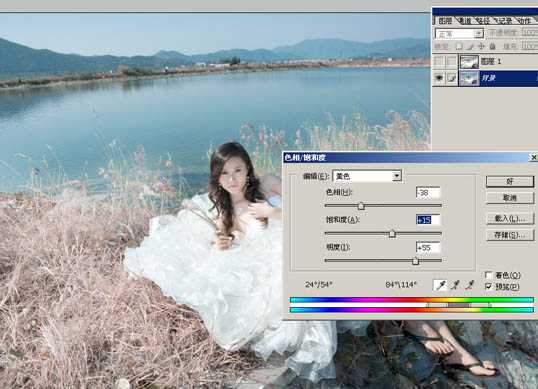
8、在背景层上执行色相/饱和度:编辑--黄色,色相-38 ,饱和度+15 ,明度+55,注意要点去图层1前面的眼睛才能看到效果。
上一页12 下一页 阅读全文
最终效果
1、打开原片,并复制图层。
2、将图层模式更改为滤色,不透明度为59%。
3、合并图层,用索套选取工具分别在人物脸上和腿上较暗的地方做选区。并适当羽化,羽化值为150像素,用曲线将选区内图片适当提亮,效果如图所示:
4、用索套选取工具在较暗的草地上做选区,羽化值为150像素,用曲线将选区。内图片适当提亮,效果如图所示:
5、进入通道--红色通道,执行快捷键Ctrl+a全选,然后再按快捷键Ctrl+c复制。
6、新建图层,执行快捷键Ctrl+v粘贴,图层模式为滤色,不透明度为78%。
7、在图层1上执行滤镜/艺术效果/胶片颗粒,参数如图所示:颗粒:0,高光区域:7 ,强度:1。
8、在背景层上执行色相/饱和度:编辑--黄色,色相-38 ,饱和度+15 ,明度+55,注意要点去图层1前面的眼睛才能看到效果。
上一页12 下一页 阅读全文
下一篇:Photoshop加强风景照片层次感及清晰度的方法