PS为飞舞的蝴蝶加上绚丽的光斑背景
(编辑:jimmy 日期: 2026/7/14 浏览:3 次 )
本教程的合成思路非常简单,只需要给蝴蝶换个背景,局部增加一点光斑,再整体渲染一下颜色即可。制作的时候蝴蝶都不需要抠出来。
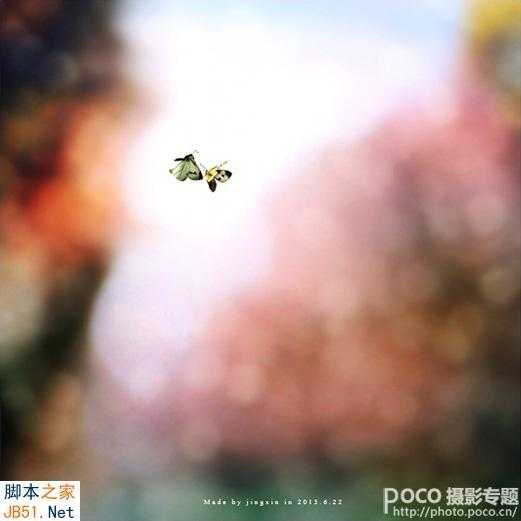
最终效果
1、打开背景素材,按Ctrl+j复制一个图层。

2、由于我只使用这个背景,把蜜蜂再放到上面显然是多余的,因此,消灭掉这只小可爱是没法的了,很简单的一个操作就行了,建立一个简单的选区,框定蜜蜂,然后羽化选区,使用滤镜->高斯模糊->选择一个较大的模糊数值,这样就搞定了哈。

3、按Ctrl+Alt+Shift+E合并图层,并将图层的模式选为柔光,这是我最喜欢的增加色彩的方式。

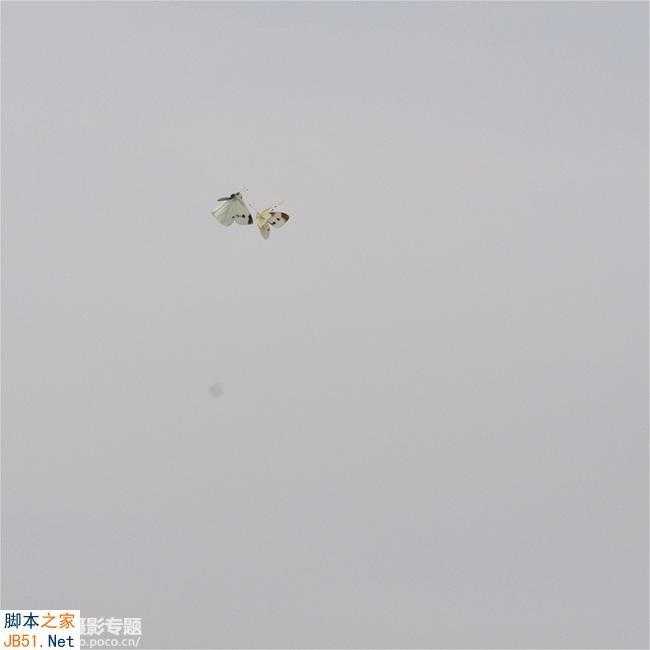
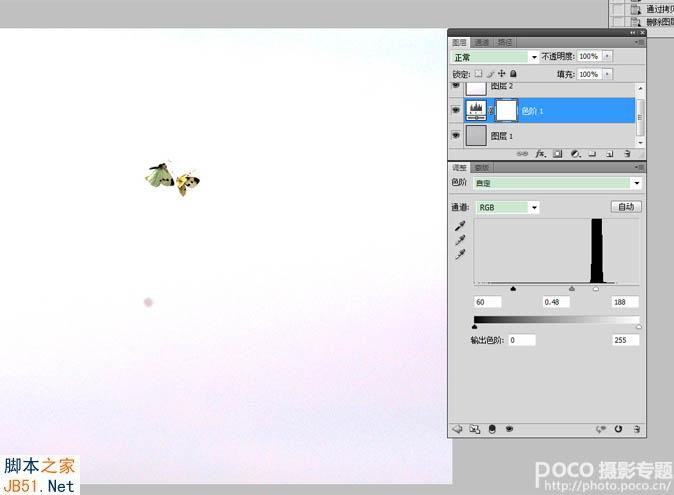
4、现在处理蝴蝶的图片,在另一个窗口打开图1,然后增加色阶调整层,把背景尽量调白。为什么?因为准备将蝴蝶放到背景图中的白色逆光里去哈。
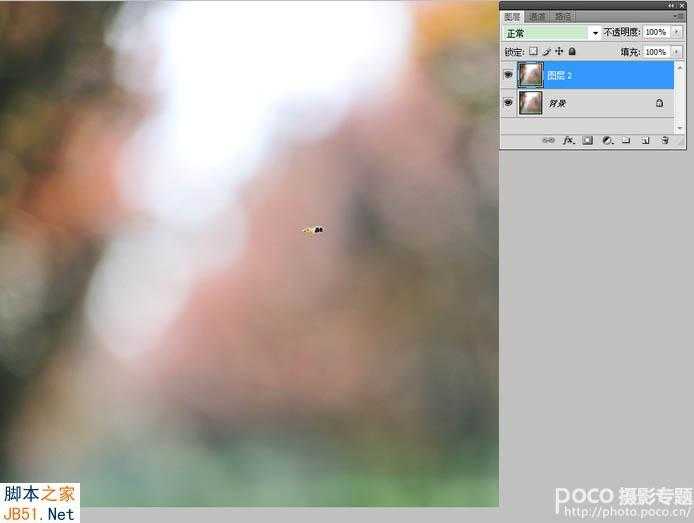
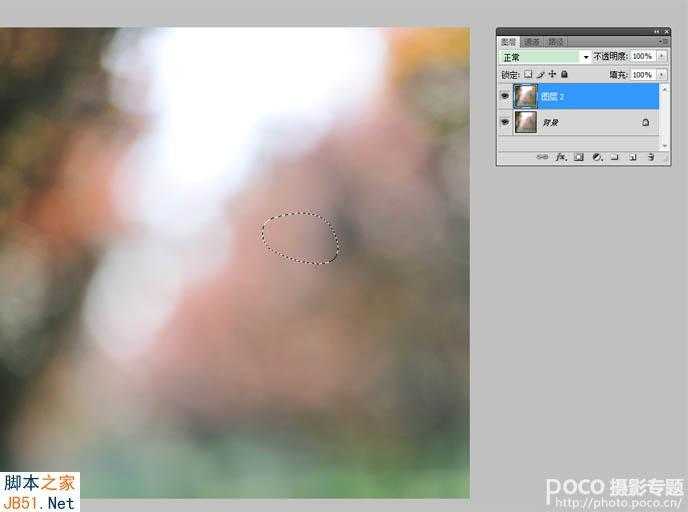
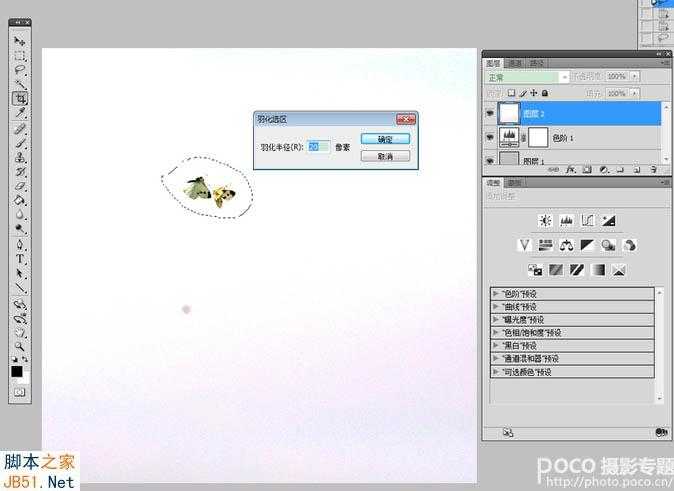
5、按Ctrl+Alt+Shift+E合并图层,在图层2上围绕蝴蝶随便建个选区,羽化一下。
6、点确定后不取消选区,直接按Ctrl+C复制蝴蝶选区,然后回到枫叶背景的窗口,按Ctrl+V将图片粘贴进来。

上一页12 下一页 阅读全文
最终效果
1、打开背景素材,按Ctrl+j复制一个图层。
2、由于我只使用这个背景,把蜜蜂再放到上面显然是多余的,因此,消灭掉这只小可爱是没法的了,很简单的一个操作就行了,建立一个简单的选区,框定蜜蜂,然后羽化选区,使用滤镜->高斯模糊->选择一个较大的模糊数值,这样就搞定了哈。
3、按Ctrl+Alt+Shift+E合并图层,并将图层的模式选为柔光,这是我最喜欢的增加色彩的方式。
4、现在处理蝴蝶的图片,在另一个窗口打开图1,然后增加色阶调整层,把背景尽量调白。为什么?因为准备将蝴蝶放到背景图中的白色逆光里去哈。
5、按Ctrl+Alt+Shift+E合并图层,在图层2上围绕蝴蝶随便建个选区,羽化一下。
6、点确定后不取消选区,直接按Ctrl+C复制蝴蝶选区,然后回到枫叶背景的窗口,按Ctrl+V将图片粘贴进来。
上一页12 下一页 阅读全文
下一篇:photoshop利用通道蒙版合成制作情侣水晶特效